5 Ways Mentorship is Transforming the Restaurant Industry

5 Ways Mentorship is Transforming the Restaurant Industry

Mentorship not only opens the door to opportunities that would have never before been accessible, it can also propagate change on a broader scale at the industry level. One such mentorship program is the James Beard Foundation’s Women in Culinary Leadership Program, awarded to women who are aspiring to careers in the culinary industry.

Cindy Pawlcyn, chef and owner of three restaurants in California, is one of the established restaurateurs providing mentorship and leadership training to grantees through the 2016 program. Cindy, along with Minneapolis restaurateur Kim Bartmann — of Barbette, The Third Bird, Pat’s Tap, and many more concepts — explains how they see the role of women evolving in this industry and how mentorship can help.

“There’s not that many women who stick with this business. The more mentoring they get, the more helpful it will be for them to be successful and stay with it long-term.”– Cindy Pawlcyn

Create a supportive kitchen culture

Kim started her career as a line cook in restaurants in Minneapolis. “I had a couple of bad experiences, especially being a woman in the kitchen in the ’80s,” she says. “I quit and vowed I would never work in a restaurant again.”

Eventually, Kim found her way back to the industry when she opened a coffee shop with a friend, and now she has eight restaurants. But early on she struggled to be taken seriously by some of her male colleagues, especially when she became an expeditor and had to tell everyone else what to do. She points to “the usual butt pinching” and the fact that at that time, there were almost no women in the kitchen at all.

Cindy knew she wanted to be a chef when she was as young as 13. She took cooking classes, catered, attended trade school at night throughout high school, and eventually graduated college with a hotel and restaurant management degree. When she was 28 she opened her own restaurant, Mustards Grill, in Napa. “Everybody told me I couldn’t do it because I was a woman,” she recalls. Having to endure name calling and other discriminatory behavior, Cindy says, “some wouldn’t believe it now, what happened in those days.”

When she applied to the Culinary Institute of America, she was told they had filled their quota of women for the next three years and advised to reapply then.

Now, Cindy says the door is opening for women, but she’s still eager to see more women finding success in this business — and that’s where mentorship can help affect change.“I think it’s good for our restaurant community if everybody could have someone that they’re bringing up. When you start being more in a teaching and nurturing and developing mindset to this one person, it spreads to all the rest of them. It’s a good culture.”

Reward people who work hard and want to learn

When asked how they managed to achieve success in the environment of those early days, Cindy and Kim have similar answers: they put their heads down, worked hard, and learned as much as they possibly could.

For Kim, that meant becoming familiar with new ingredients and learning to execute the same dishes and techniques perfectly every time. “The only way you can get that skill set in a kitchen is by having a mentor, a chef, or a teacher teach you how to do it – on-the-job training,” she says. “And to be able to utilize a mentor, you have to be willing to accept the help and learn from other people’s mistakes and successes. Those are rare people in the world.”

Cindy advises not to leave a job before you’ve learned everything you can from that place. “People come in with a pre-determined, ‘I’m going to work here six months or a year and a half,’ but it doesn’t really matter how long it is. It matters how much you get out of that experience.”

Offer real-life training for a broad range of skills

Grantees under Kim will have a program tailored to their goals, but she hopes to mentor someone who wants to learn about multi-unit management, her area of expertise. As manager of eight sets of chefs and front-of-house managers, she offers a unique perspective into the business and operations of a restaurant group.

Similarly, Cindy looks forward to teaching someone how to grow food for a restaurant in Mustards’ garden. They will learn how to harvest, order and plan ahead, work all stations in the front and back of house, work with all of the managers, and build their wine experience by working with local wineries. “I think you have to take the time out of your day to put somebody under your wing, versus just having them work a station,” Cindy explains.

“You have to teach them how your mind thinks and how you make a decision. You have to say how you’re going to do this and why you’re going to do it that way.”

She sees younger team members who come on board and don’t understand what the restaurant business really is — those who just want to be a TV chef. They don’t have management skills or know how to make the business profitable or cost recipes. “You don’t learn that in school, you learn that on the job and facing real day-to-day experiences.”

Make yourself a better, stronger leader

Young chefs aren’t the only ones who benefit from a mentoring relationship; As Cindy and Kim explain, there are massive rewards for the mentors, too. Once you’re explaining your thought processes and nurturing your team, you begin to reexamine and refine your techniques, which is always healthy for the team and the business.

“When they come in and go, ‘why do we do it this way?’ You’ve got to figure out why we do it this way,” says Cindy, because “maybe there is a better way.”

Provide the knowledge and confidence to achieve goals

Kim and Cindy both have benefitted from the support of mentors throughout their careers. Kim opened her coffee shop by maxing out her single mother’s credit card. Later on, she participated in a benefit dinner and was introduced to four female leaders of the Minneapolis food and wine scene: Brenda Langton, Lynne Alpert, Pam Sherman, and Nan Bailey.

“All of the sudden I had somebody to call when I had a really difficult question or a problem that I couldn’t figure out. That can be a really powerful thing, to have that assistance.”

Working with mentors like Rich Melman and Julia Child, Cindy built the skill set and confidence she needed to succeed. Julia taught her to stand her ground, to cook good food, and to use good ingredients. Rich has advised her every time she opened a restaurant; she would call him with questions or challenges (and still does).

She learned to trust herself even when others assured her she wouldn’t succeed. “That’s important, to be able to have confidence in yourself and go out on your own,” she explains, remembering making the decision to walk away from her business partnership of 22 years. “They would mess with me and say, ‘On your own you’re not going to be very good because you don’t know how to do this and that.’ In the end, I knew how to do all that stuff.” And it was because of mentorship.

The James Beard Foundation’s Women in Culinary Leadership Program provides aspiring female chefs and restaurateurs the chance to work with some of the industry’s most influential leaders, building in-depth skills in the front and back of house. Now in its third year, the program aims to break through the glass ceiling of the culinary world. Now accepting applications through February 8th. Learn more and apply here.

This article was originally posted on Open For Business.
Calculating Actual & Theoretical Food Costs

Calculating Actual & Theoretical Food Costs

Controlling food costs is integral to running a profitable restaurant. At its heart lies the challenge of balancing the (rather) static cost of the item displayed on the menu with the daily variations in cost for its ingredients. To ensure this, restaurant operators and managers must think of food cost as a performance metric; by comparing actual food costs to theoretical costs over time, restaurants can maintain profitability.

Food Costs As A Performance Metric

To gauge how well a restaurant is managing its food costs, you must first understand what a restaurant’s Theoretical Food Costs are, based on current inventory costs of all ingredients for the meals sold, and assuming perfect portions, no breakage and no shrinkage. Once the restaurant’s Theoretical Food Cost is known, you can then compare it to their Actual Food Cost, which is simply the actual cost of all the food that the restaurant used for a given period.

The difference between the two is the true measure of efficiency in food cost control; it’s called the Actual vs. Theoretical Variance and reducing it to its lowest possible point is the goal.

How To Calculate Theoretical Food Costs

Theoretical Food Cost is what your food cost should be in an ideal world with perfect portions and no breakage, waste, or shrinkage reported as a percentage of Total Food Sales. To calculate it, you need the following information:

  • Food Cost for each menu item, calculated with a very accurate tally of the quantity and cost of each ingredient that goes into each menu item, including any ‘paper costs’ such as napkins, wrappers, and bags.
  • Units Sold for the period for each item, which should be easily exportable from your Point of Sale system.
  • Total Food Sales for the period, in dollars.

Theoretical Food Cost (%) =

[ ( item A Food Cost × item A Units Sold ) + ( item B Food Cost × item B Units Sold ) + ..] / Total Food Sales × 100

Because each restaurant has so many items sold and so many ingredients for each item, this is a very difficult calculation to do manually. If your sales data is synced with your inventory system, this is likely a report that can be run with no manual intervention. Ideally it is run every time you calculate your Actual Food Cost.

How To Calculate Actual Food Costs

Actual Food Cost, also reported as a percentage of total sales, is a measure of how much your food cost truly is. It’s a straight-forward calculation, but it relies on taking careful and regular inventory counts. The formula for Actual Food Cost requires the following information:

  • Beginning inventory, or the total cost of inventory at the beginning of the period. It’s important to note that if the cost of something has changed, it’s best practice to use the most recent unit cost.
  • New inventory purchased, or the total cost of inventory purchased throughout the period.
  • Ending inventory, or the total cost of inventory left unused at the end of the period.
  • Total Food Sales for the period, in dollars.

Actual Food Cost (%) =

 [ ( Beginning Inventory + New Inventory Purchased ) – Ending Inventory ] / Total Food Sales × 100

How To Calculate Actual vs. Theoretical Variance

This is the measure of efficiency in controlling food costs; the result tells you how closely the restaurant’s Actual Food Cost was to their Theoretical Food Cost.

Actual vs. Theoretical Variance =

Actual Food CostTheoretical Food Cost

Although Theoretical and Actual Food Costs will never match, meaning your variance will never be 0, what you are looking for are trends when the divergence is increasing or when there are sudden changes. These changes are a signal to investigate the cause of the discrepancy.

The most common cause of increased variance (and higher than desired food costs) is inaccurate inventory. To reduce error, follow inventory management best practices. Another possibility is that you are wasting a lot of food. This may be due to inefficient portioning, spoilage, employee theft or error. The other, much more concerning, possibility is that the cost of what you are selling is out of line with what you are charging. Most often, this is because prices on the menu have not been updated to reflect increasing food costs.

10 Best Practices For Managing Restaurant Inventory

10 Best Practices For Managing Restaurant Inventory

Taking inventory is an unpopular task at most restaurants, but one that is critical to controlling food costs and improving profitability. Yet, when we speak with restaurant owners, many admit that they either do a poor job at it, or do it infrequently. In most cases, the underlying issue is a lack of structure around the inventory-taking process.

With that in mind, here are ten tips to help improve inventory accuracy at your restaurant:

  1. Take inventory frequently. For some items it should be done daily, for others twice a week. At a minimum, it needs to be completed before placing weekly orders.
  1. Take inventory after the restaurant has closed, or before it opens. You cannot take accurate inventory while goods are being sold. Whatever time you pick, stick with it. If you always take inventory on Tuesdays, but sometimes you do it at night and sometimes in the morning, there will be fluctuations in week to week results.
  1. Take inventory before a new shipment arrives and then add the new stock to your counts. Do not attempt to take inventory while deliveries are being made. Items will end up being double-counted.
  1. Clean out and organize your stock areas before taking inventory. Throw out items that have expired, move similar items to the same shelf and in general, tidy up.
  1. Use Inventory Count Sheets. Have one for daily, one for weekly and one for monthly counts (or whatever periods you use) and standardize the items included and the unit (pounds, number of items, boxes etc) each item is tracked in. Changes in what items are tracked can cause large fluctuations in recorded inventory. Use a product like LiveInventory to create these sheets and track results over time.
  1. When taking inventory, make part of the practice ensuring that items are being used on a First In, First Out (FIFO) basis. Older goods should be rotated to the front of shelves so they are used first. Additionally, try to keep the amount of items you have on hand as low as possible to reduce theft and spoilage.
  1. Use two people to take inventory. They should count items separately and then compare results for anomalies. Pairing reduces errors and the temptation to manipulate results or pocket goods.
  1. Use the same staff to take inventory. They will not only get faster at it, but they will tend to be more consistent.
    If you use scales to weigh inventory and measure portions, calibrate them weekly.
  1. Standardize what your unit cost is. The price of many items (like ground beef) changes week to week.
  1. Use the latest price paid as the standard. It is the easiest to find and remember.

The most critical piece of the inventory puzzle is consistency. Using the same staff, taking inventory at the same time and counting the same items are some of the easiest ways to improve your accuracy.

This article originally appeared on Livelenz.

Chef and Brew 2015

Chef and Brew 2015

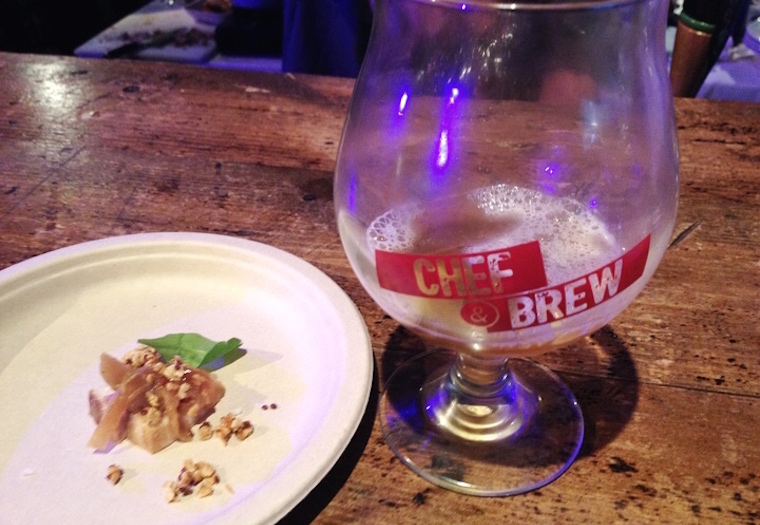
The colors of Denver’s bursting restaurant scene shined brightly last night at the 2015 Chef and Brew Festival. The festival featured some of Colorado’s most prominent restaurants and breweries teaming up to form unique amalgamations of craft beer and fine food. From sour beers and ramen to pork belly and Gotlandsdrika, 21 local restaurants and breweries flexed their creative muscles to reinvent the art of food and drink pairing.

What made this event so unique was that it not only reflected the innovativeness of Colorado’s craft beer and food scenes, but also the daringness exhibited by the teams in pairing esoteric beer and exquisite food to accent the flavors of each.

Each restaurant offered both a savory and a sweet option, allowing for a variety of pairings with the breweries. The chefs and brewers flipped the conventional notion of food pairing on its head by meshing unlikely flavor profiles together, a stark contrast to the ever-so-predictable wine and cheese pairing.

IMG_4875

While beer and food pairings are nothing new, Chef and Brew took the game to a whole new level by introducing uncommon approaches to highlighting taste. Darrell Jensen, Executive Chef of Samples World Bistro, exemplified this edgy experiment. Teaming up with the Great Divide Brewery, Jensen prepared a dashi-marinated shrimp lettuce wrap to pair with the brewery’s Titan IPA. It may sound like an odd pairing; a light and fresh dish with a hop-heavy IPA? But however odd it may seem, it worked! The hops accentuated the dashi broth in the shrimp while the crisp finish of the beer combined with the dish’s bib lettuce, pickles and carrot made for a truly delicious experience.

FullSizeRender

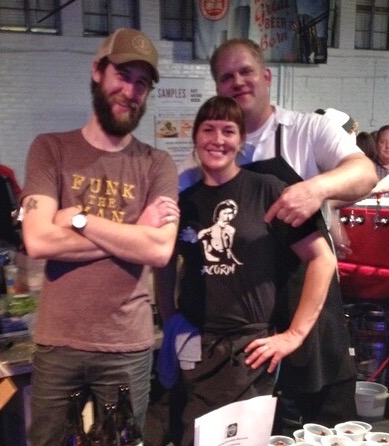
The pairing presented by Acorn and River North Brewery was the epitome of the night’s uniqueness, serving a chicken and pork belly ramen with the ‘Oud Bruin’ Belgian-style brown sour beer. Having won the contest last year, Chef Amos Watts and River North picked up where they left off by masterfully masking the dominant sour taste of the Oud Bruin with a hearty, savory ramen soup. Amos’ success in dismantling the structure of a sour beer with opposing, yet somehow complementary flavor profiles demonstrated the creativity illustrated at the event.

FullSizeRender-2

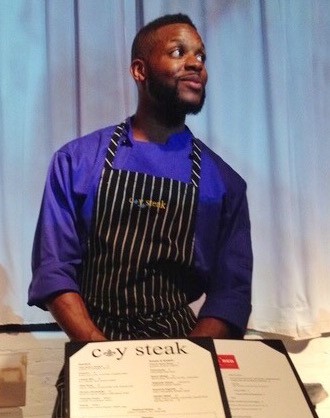
On tap were some of Denver’s most experimental and new-age beers. Jagged Mountain Brewery provided two of the most intriguing beers, a Swedish-style smoked-malt Gotlandsdrika called “Men Who Drink from Goats” and a Grizzly Peak session porter. Teaming up with Anthony Smith and CY Steak, Jagged Mountain accentuated Smith’s pork belly and arugula dish, delivering a powerful blow of lasting smoky richness when combined with the Gotlandsdrika.

The session porter, a prime example of the event’s innovative beer technique, reflected the dynamic world of Denver craft brewing by taking a traditionally heavy beer and transforming it into a light, low-alcohol-content session beer to be paired perfectly with Smith’s sweeter dessert.

The inventiveness displayed by all of the participating restaurants and breweries most definitely showcased the bountiful talent and enormous originality of Colorado’s food and brew scenes.

For me, the Chef and Brew Festival opened my eyes to the developing identity of Colorado’s food and beverage industry. With a vibrant craft brewing community rapidly taking root here in Colorado, the local restaurant industry is taking advantage and leveraging peoples’ propensity for unique beers by catering their tastes to match. Festivals such as this clearly demonstrate that this is what the future holds for the food and drink scene. As a Colorado resident, I am eager to see this trend continue and watch as the restaurant and brewing industries form a new and intertwined culture.

Kitchen Hacks Part 4: Satisfy Your Sweet Tooth

Kitchen Hacks Part 4: Satisfy Your Sweet Tooth

It’s the final installment of our kitchen hacks series, so we obviously had finish it off with desserts! Get the sweet tips here.

Key-lime pie from start to finish in 10 minutes.

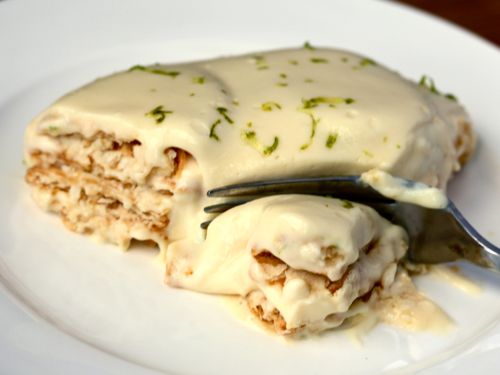
Skip the oven to save time on your next key-lime pie. All you need is heavy cream, sweetened condensed milk, lime, and Ritz crackers. Start by making the custard: combine the heavy cream, condensed milk, and lime juice and stir. Then, pour a layer of the mix into your pie dish (or glass if you prefer), cover it with a layer of crackers, and repeat. Chill the cake until frozen and enjoy.

10 minute key-lime pie

Powder your sugar at home.

Don’t have confectioners’ sugar? No need to go to the grocery store because you can make it at home using granulated sugar and a blender or food processor. Add the sugar to your mixing device of choice and set it to ‘pulse’ or ‘blend’ until it has reached a powdery consistency. Sift through a strainer and you’re good to go!

DIY powdered sugar

Forget the frosting; make it with marshmallows.

This will save time and earn you creativity points: instead of frosting your cupcakes with frosting, melt marshmallows on top. After your cupcakes are baked, place a marshmallow on top of each, and stick them back in the oven for 3-5 minutes. Remove from the oven and press down gently to create that snow-white cap.

Pro-tip: For a more toasty topping, broil the marshmallow topped cupcakes, but be sure to watch them closely!

Marshmallow topped cupcakes

No more batter splatter means easier cleanup.

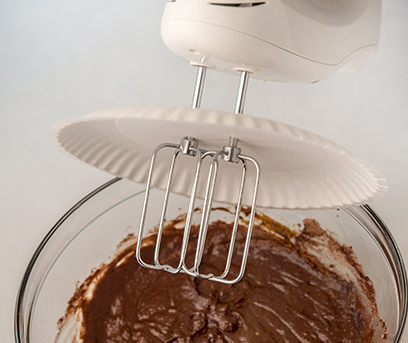
Whether you’re making cake, cookies, or something on the savory side, stop your batter from getting all over the place with a paper plate. Just poke the ends of your mixer’s beaters through the middle of a paper plate before attaching them to the mixer. The plate will act as a shield, keeping your batter where it’s supposed to be.

No more batter splatter

Use dental floss to slice cakes.

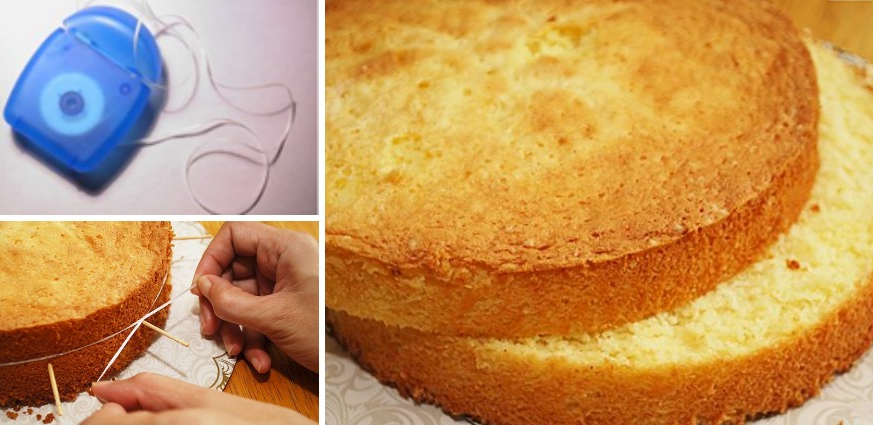
First, make sure you are using waxed, unflavored floss. You don’t want a minty cake! Then, place toothpicks around the cake where you want to slice. Align the dental floss around the row of toothpicks and wrap fully around the cake. Hold the ends with each hand and pull out and away from the cake, so the floss cuts through the cake as the circle of floss tightens. Move the floss slightly from side to side to help the cutting movement. To separate the layers, slide a piece of cardboard or baking sheet with no sides in-between and lift the top layer. And voila!

Pro-tip: For sponge cakes, use a serrated knife to make a few cuts along the toothpicks to give the floss a head start.

Slice cake, easy

Save cakes from going stale.

If you’re lucky enough to have leftover cake (especially after reading this), keep it nice and moist with just bread and toothpicks! Cover the cut, un-frosted part of your cake with bread slices and hold them in place with toothpicks, then store in the refrigerator. The bread will get hard and stale, but the cake will stay nice and soft. Sorry, bread—you’re being sacrificed for a greater good.

Keep cake moist

Get more kitchen hacks here.